
Ark Nova
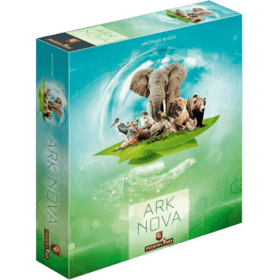 У Ark Nova вы будзеце планаваць і праектаваць сучасны заапарк з навуковымі метадамі кіравання. Пераследуючы канчатковую мэту стаць уладальнікам самай паспяховай заалагічнай установы, вы будзеце будаваць вальеры, размяшчаць жывёл і падтрымліваць прыродаахоўныя праекты па ўсім свеце. У дасягненні гэтай мэты вам дапамагацьмуць спецыялісты і ўнікальныя будынкі.
У кожнага гульца ёсць набор з пяці карт дзеянняў для кіравання гульнявым працэсам, і сіла дзеяння вызначаецца слотам, які карта займае ў дадзены момант.
У аснове Ark Nova ляжаць 255 карт з выявай жывёл, спецыялістаў, унікальных будынкаў і прыродаахоўных праектаў, кожная з якіх мае асаблівасці. Выкарыстоўвайце іх, каб павялічыць прывабнасць і навуковую рэпутацыю вашага заапарка і зарабіць балы аховы прыроды.
Колькасць гульцоў: 1 - 4
Працягласць гульні: 46 mn
Складанасць: 4 / 5
Згуляйце ў Ark Nova і 1412 іншых гульняў онлайн.
Без запампоўкі, проста з вашага браўзэра.
З вашымі сябрамі і тысячамі гульцоў з усяго свету.
Гуляйце бясплатна.

Згуляйце ў Ark Nova і 1412 іншых гульняў онлайн.
Без запампоўкі, проста з вашага браўзэра.
З вашымі сябрамі і тысячамі гульцоў з усяго свету.
Гуляйце бясплатна.
Кароткія правілы
Агляд
Запрашаем у „Новы каўчэг“! У гэтай гульні вы загадваеце сучасным заапаркам. Акрамя будаўніцтва вальераў і засяленьня іх папулярнымі жывёламі, вы будзеце здабываць спонсараў і падтрымліваць прыродаахоўныя праекты. Гэта выконваецца на сваім ходзе адным зь пяці дзеяньняў, сіла кожнага зь якіх вызначаецца пазыцыяй у чарзе — чым даўжэй мінула часу з тае пары, як вы гулялі гэтае дзеяньне, тым мацнейшым яно становіцца. Ваш вынік вымяраецца і ў прывабнасьці (абразок білета), і ў кансэрвацыі (абразок зялёнага шчыта), і калі гэтыя два значкі перасякуцца на выніковай таблічцы, надыходзіць канец гульні. Усе гульцы ходзяць яшчэ па адным разе, і перамагае той, хто набраў найбольш пунктаў: то бок чые паказьнікі прывабнасьці і кансэрвацыі стаяць найдалей адзін ад другога!
Дзеяньні
На сваім ходзе вы можаце выбраць адну зь пяці картаў дзеяньня. У залежнасьці ад пазыцыі карты дзеяньня ў вашай чарзе яна мае розную сілу — ад 1 да 5. Сілу можна павялічваць, дадаючы X-жэтоны. Пасьля выкананьня дзеяньня ягоная карта перамяшчаецца ў крайнюю левую пазыцыю, на сілу 1, а ўсе астатнія дзеяньні падсоўваюцца на 1 крок управа.
Пасьля выкананьня пэўных умоваў вы зможаце паляпшаць карты дзеяньняў, перакульваючы іх на ружовы бок; такімі яны застануцца да канца гульні. Палепшаныя карты дазваляюць вам выконваць дзеяньні эфэктыўней, але ў астатнім адпавядаюць звычайным правілам.
Будаўніцтва
Простае дзеяньне будаўніцтва дазваляе пабудаваць адзін вальер ці спэцыяльны будынак памерам ад 1 да 5 плітак. Вальеры патрэбныя для таго, каб зьмяшчаць туды жывёлаў. Пры будаўніцтве вы аплачваеце 2 манэты за поле (напрыклад, за будаўніцтва вальеру памерам 3 ці за спэцыяльны кантактны заапарк заплаціце 6 манэтаў). Усе новыя вальеры і будынкі мусяць дакранацца ўжо існых будынкаў вашага заапарку. Накладаць адзін на адзін нельга, і нельга таксама будавацца на скалах ці вадзе.
На некаторых палёх намаляваныя рыдлёўкі зь лічбай „II“ — там нельга будаваць, пакуль вы не палепшыце дзеяньне будаўніцтва.
Калі вы будуеце на плітках зь іншымі абразкамі, то атрымліваеце пазначаныя на іх „бонусы разьмяшчэньня“.
У любым момант гульні вы можаце паглядзець усе магчымыя звычайныя вальеры і формы будынкаў на закладцы, націснуўшы на маленькую рыдлёўку каля верхняга правага кута сваёй мапы.
Спэцыяльныя будынкі
Шапік — цёмна-шэры будынак памерам 1. У перапынку прыносіць 1 манэту за кожны суседні будынак ці заняты вальер.
Павільён — ружовы будынак памерам 1. Пабудаваўшы павільён, атрымліваеце 1 прывабнасьць.
Кантактны заапарк — спэцыяльны будынак памерам 3. Некаторыя жывёлы могуць жыць толькі ў кантактным заапарку, але там могуць жыць некалькі жывёлаў. Можна пабудаваць толькі адзін кантактны заапарк.
Палепшанае будаўніцтва
- Дазваляе будаваць некалькі вальераў і/або будынкаў агульнай сілай ня большай, чым сіла дзеяньня — напрыклад, пры сіле 5 можаце адразу пабудаваць вальер памерам 3, вальер памерам 1 і шапік (але нельга пабудаваць вальер сілай 3 і два шапікі, бо ўсе будынкі маюць быць розныя)
- Дазваляе будаваць на палёх, якія патрабуюць палепшанага будаўніцтва.
- Дазваляе будаваць тэрарыюм і вальер для вялікіх птушак. Як і кантактны заапарк, гэтыя будынкі могуць зьмяшчаць некалькіх жывёлаў пэўнага тыпу. Будуючы тэрарыюм ці вальер для вялікіх птушак і маючы прыдатную жывёлу, якая можа жыць у адным з гэтых спэцыяльных будынкаў, можаце адразу перамясьціць яе туды, вызваліўшы такім чынам вальера для іншай жывёлы.
Карты
The Cards action allows you to draw more cards. Depending on the strength of this action, you'll draw one or more cards from the top of the deck and possibly discard cards from your hand (possibly including ones you just drew). At strength 5, you may instead "snap" one card from the board directly to your hand. Keep in mind that the hand limit (3, or 5 if you've acquired the appropriate University) will be enforced during Breaks. Additionally, note that using the Cards action moves the Break counter up by 2.
Палепшаныя карты
- Allows you to draw cards directly from the board within your reputation range (to the left of your reputation marker).
- Allows you to "snap" cards from the board at strength 3 or more.
- Allows your reputation range to reach levels higher than 9, with associated bonuses.
- Allows you to draw more cards overall at a given strength and discard fewer cards.
Жывёлы
The Animals action allows you to play animal cards into your zoo. Each animal has a monetary cost and also requires an enclosure of a specific size or larger. Some may also need to border the rocks/or water. Be sure to note any other prerequisites that are listed on the left side, such as having a particular icon (e.g., Australia, Predators, or Research) in your zoo. Prerequisites for playing the card will always be on its left edge.
When you play a new animal card, you gain the bonuses listed on the bottom edge of the card. The most common things this gives are
- Appeal points (ticket icon)
- Conservation points (green shield icon)
- Reputation points (black mortarboard cap icon)
Most animal cards will have at least one animal type - Reptiles, Birds, Bears, etc. - and a region - Americas, Africa, Europe, etc. (Petting Zoo animals do not have a region.) These icons are very important for deciding which Conservation Projects you can score later.
Палепшаныя жывёлы
- Allows you to play multiple animal cards at a lower strength;
- Allows you to play animals from your reputation range (to the left of your reputation marker) and not just your hand;
- Allows you to play certain animals that list Animals (II) as a prerequisite on their left edge.
Спонсары
The basic Sponsors action allows you to play a sponsor (blue) card from your hand. The minimum action strength required for each Sponsor card is listed at its top-left corner. These typically don't cost any money to play, but may have other requirements. Sponsor cards are color-coded to tell you whether they will give you benefits now, later, and/or at the end of the game:
- A yellow box lists what you get immediately when the card is played.
- A purple box lists what you get on each break.
- A blue box lists what you get upon another condition, such as playing or getting certain icons.
- A brown box lists what you will get at the end of the game.
If you don't have any Sponsor cards you want to play, you can also use the Sponsors action to both gain money and move up the Break counter by an amount equal to the action's strength.
Палепшаныя спонсары
- Allows you to play sponsors from the board within reputation range (to the left of your reputation marker) instead of from your hand;
- Allows you to, instead of playing a Sponsor card, gain money equal to the twice the action's strength (and Break equal to the action's strength);
- Allows you to play sponsors that list Sponsors (II) as a requirement;
- Allows you to play multiple sponsors with a single action;
- Allows you to play sponsors of 1 greater strength than the strength of the action.
Асацыяцыі
The Association action allows you to send your worker(s) to the association board to take actions there. You start with just one worker, but can gain more workers as the game progresses. Workers return to your supply only at Breaks. When you use the Association action, you may do one of four things depending on the strength of the action:
- Strength 2: Gain 2 reputation (one of the most straightforward ways to get reputation);
- Strength 3: Gain a partner zoo (handshake icon). Playing animals from that continent permanently costs 3 less money per continent icon they have, and you gain an icon of that type. Place this on the right side of your board (starting at the bottom) -- you gain any bonus this covers up.
- Strength 4: Gain a partner university (gray monument icon) -- these will give reputation, research icons, or an improved hand size limit;
- Strength 5: You can support a conservation project (existing or from hand) -- these will typically be some milestone (e.g., requiring X number of Africa icons or Reptile icons).
Other players' workers do not affect your ability to place your workers; there is unlimited space on each section of the Association board. However, choosing the same Association action a second time before the Break will cost you two workers instead of one (for a total of three). All the partner zoo and university tiles will be replenished at each Break.
Typically conservation projects will give you all-important conservation points, and possibly other benefits. To score a conservation project, your Association action must be at 5 strength. When you take the action, take one of the cubes from the left side of your player board and place it on the conservation project. Whatever space the cube comes off is the benefit you'll get. If it comes from the yellow section, you'll get the benefit immediately but only once, and if it comes from the purple/yellow section, you get the bonus immediately and also at each Break. Note that you typically can't claim more than one level of a particular conservation project, so you'll have to judge when it's time to take the action vs waiting until you have more of the appropriate icons.
If a conservation project requires you to "release an animal", you'll be discarding a previously played animal, losing its appeal points and icons, as well as emptying an enclosure of the same size as the animal required. However you'll still have the conservation points and can reuse the enclosure. Therefore, it can be beneficial to release animals with icons for which you've already scored the relevant conservation project.
Base conservation cards are drawn at the beginning of the game and known to every player. They involve animal-type collection or habitat icons. There are additional conservation project cards in the deck that can be played from your hand when supporting a conservation project with the Association action.
Палепшаныя асацыяцыі
- Allows you to split the actions' strength between multiple actions.
- Allows you to have more partner zoos.
- Allows you to donate money directly to get conservation points! The first person who uses this pays only 2 money for a conservation point, but every person who uses it thereafter must pay more and more, up to a maximum of 12 money for a conservation point;
- Allows you to play conservation project cards from the board within reputation range (to the left of your reputation marker).
Іншае
X-жэтоны
If you can't or don't want to take any of the other actions, you may take one X-Token from the supply. Recall that you can spend X-tokens to increase the strength of any action by 1 (per token). After taking the X-token, move any action card to strength 1 of your board, pushing the other cards to the right. This is not usually an efficient choice, but can be a good way to gain X-tokens.
Паляпшэньне картаў дзеяньняў
There are four ways to upgrade an Action card. Since there are five, at least one will not be upgraded. The four ways to upgrade a card are:
- Advancing your conservation score to 2 (this gives the option of either upgrading a card or gaining an additional association worker).
- Advancing your reputation to 5.
- Playing a second university.
- Playing a second partner zoo.
Дадатковыя працаўнікі асацыяцыі
Recall that each association action requires an association worker, and if you have already taken that association action since the last break, it requires two association workers. Your association workers return to you when the Break occurs. You start the game with one worker, and can gain up to three more. Depending on which map you are using, there may also be a conservation point bonus for obtaining your fourth conservation worker.
The ways to obtain additional conservation workers are:
- Advancing your conservation score to 2 (this gives a choice between getting an association worker or upgrading a card).
- Advancing your reputation score to 8.
- If an association worker is one of the bonuses that may be chosen when you support a conservation project (except when using map 0, in which case a conservation worker may be obtained by covering a specific spot on your zoo map).
- Gaining a third partner zoo (this requires that the association action has been upgraded)
- Certain animals (usually bears) and sponsors have the Full-Throated ability, which gains you an association worker when played.
Сьцежкі
Сьцежка перапынку
Players continue taking actions, some of which generate Break, until the Break track meets or exceeds 15. The player who triggered the Break receives one X-token. Then, the following steps happen:
- All players discard down to their hand limit (starting hand limit is 3, but having the relevant University ups it to 5);
- Take any multiplier tokens off action cards, and any venom/constriction tokens off cards, if any exist;
- Return all Association workers to the players and replenish the partner zoos and partner universities;
- Discard the two leftmost cards of the card display, slide the remaining cards to the left, and replenish the display.
- All players receive income from base zoo appeal, kiosks, sponsors, and possibly spaces on the left side of the board from which cubes have been removed to contribute to conservation projects.
Then the Break track marker resets, and the next player can take their turn as normal.
Сьцежкі прывабнасьці і кансэрвацыі
To track how many Appeal points and Conservation points players have, you have two tokens that start from opposite ends of a long track. (On BGA, you can click the appeal + conservation icon in the top right to see this.) Note that conservation points are more valuable than appeal (one conservation is roughly equal to three appeal), but also more difficult to gain.
Moving your marker further on the appeal (tickets icon) track increases the amount of income you get per turn.
Moving your marker to certain key points on the Conservation track (green shield icon) gives the effects in pentagons:
- *At 2 points, you may either upgrade an action or gain an Association worker.
- At 5 and 8 points, you may gain a benefit chosen for that particular game, each shown in a yellow pentagon. (Everyone can get the 5 money bonus, but only one player can get either of the others).
- When one player reaches 10 points, all players discard one of their bonus cards.
Сьцежка рэпутацыі
The Reputation track is largely used for drawing and playing cards from within reputation range. By playing directly from the display, players can more efficiently play animals, sponsors, and conservation projects. Note that playing directly from reputation range has an additional cost equal to the card's location in the display -- playing an animal at the 6th folder would cost 6 additional money.
As with the conservation track, there are bonus effects when crossing certain levels on the Reputation track, most of which are near the end of the track. Keep in mind players will need the upgraded Cards action to gain more than 9 reputation.
Канец гульні і падлік
Your score is measured by both Appeal (Файл:ArkNova Appeal.png) and Conservation (Файл:ArkNova ConservationPoints.png). When they cross each other on the scoring track, the endgame is triggered. All other players take one more turn. The player with the most points (as measured by how far apart these two trackers are from each other) wins!


Conservation points or Appeal come from your Final Scoring card(s), as well as all your cards with end-of-game scoring (generally the brown section on Sponsors cards).
Scoring is different from the original game. All conservation point spaces feature a small number. To determine your score, you must add your appeal to the number of spaces with your conservation point marker on it. No more calculating the distance between your 2 markers. The numbers are calculated in such a way that having your 2 markers reach each other will score you exactly 100 points. If your markers cross, your score will be above 100. If they don't, it will be below. Therefore, 100 points is the threshold to end the game. In case of a tie, the player who supported the most Conservation Projects wins the game.
Мапы
Map 1 (Observation Tower): The enclosure must be adjacent to the space with the tower, not just any one of the other 3 rock spaces. The platform does not affect special enclosures. If you release an animal into the wild, which flips the occupied enclosure back to the unoccupied side, then place a new animal in this enclosure, you regain the 2 appeal. The Observation Tower itself does not count as a building for kiosks.
Map 2 (Outdoor Areas): The enclosure must be adjacent to the space with the Outdoor Area, not just any one of the other 4 water spaces. The Outdoor Area does not affect special enclosures. Treat any standard enclosure adjacent to the Outdoor Areas as if it were 2 spaces larger (i.e., if you built a standard 1-space enclosure adjacent to the Outdoor Area, it may hold an animal that requires an enclosure of 1, 2, or 3 spaces). The Outdoor Area itself is not considered a building for kiosks.
Map 4 (Commercial Harbor): The Commercial Harbor is connected as soon as you place a building on the adjacent building space. You may build your first building directly adjacent to the Commercial Harbor, but you do not have to. You may use the ability at any time during your turn, but not during Break or someone else's turn. You may only discard 1 card with the Commercial Harbor per turn. The Commercial Harbor itself does not count as a building for kiosks.
Map 5 (Park Restaurant): During the break, you gain 1 money for each space adjacent to the Park Restaurant with a building on it. It does not matter if these are single buildings or if several spaces belong to the same building. It also doesn’t matter what kind of buildings you build there and whether enclosures are occupied or not. The Park Restaurant itself does not count as a building for kiosks.
Map 6 (Research Institute): The Research Institute is connected as soon as you have placed a building on the adjacent building space. You may build your first building directly adjacent to the Research Institute, but you do not have to. Once active, you can play Animal cards even when you are 1 condition short; you must still fulfill all other conditions. You cannot ignore rock or water requirements.
Map 7 (Ice Cream Parlors): If you have covered all bonus spots granting kiosks, you gain 1 additional money for each kiosk on your zoo map as income during the break. It does not matter if these kiosks were built as placement bonuses or by other means. It also does not matter whether they generate income without this bonus.
Map 8 (Hollywood Hills): Spaces with an H may be covered like any other space. This is similar to a placement bonus, but does not count as one for cards like Archaeologist (#221). Every time you place a building on an H, reveal cards from the deck one by one until you reveal a Sponsor card. Add this card to your hand and put all other revealed cards onto the discard pile. Once you have covered all 3 spaces, the level of each Sponsor card you play is 1 lower.
Variants
Marine Worlds
Marine Worlds expands the base game by adding aquariums and marine animals.
Bonus Tiles on Maps
In addition to purple (activated on break) and yellow (immediate one-time benefit), some bonus tiles are gray. These grant a one-time bonus that can be saved and used during any of your turns.
| Icon | Description |
|---|---|
| Файл:ArkNovaMW threeConditions.png | You may ignore up to 3 conditions when playing an animal card. |
| Файл:ArkNovaMW returnAssociationWorker.png | Return 1 Association Worker from the Association Board to the notepad on your map. (Same as the ability Extra Shift.) |
| Файл:ArkNovaMW wildIcon.png | When you support a base conservation project, you may use this as any icon. (Essentially a wild icon.) |
| Файл:ArkNovaMW threeKiosks.png | You may place three kiosks or pavilions. (Same as the ability Posturing.) |
| Файл:ArkNovaMW threeScoringCards.png | Draw 3 new scoring cards, then discard three scoring cards. (Same as the ability Adapt.) |
| Файл:ArkNovaMW snapAndHandLimit.png | This has two different effects. The first is immediate and one-time: snap 1 card. Second is ongoing: Hand limit increased by 1. |


Action Cards
Animals
- If this action's strength allows you to play 2 animals at once, but you only play 1, you may ignore 1 condition on that card.
- If not upgraded:
- The cost of the first Animal you play this turn by 2.
- When the turn is complete, if you have no Animal cards in your hand, you may take 4 cards from the deck, choose 1 animal card from them, and discard the others. (Same as animal ability Hunter 4.)
- When the turn is complete, place a player token on an Animal card in the display that has no player token. When a card with your player token is discarded, it goes into your hand instead. If it leaves the display in any other way (e.g., drawn into hand, played from the display by another player), gain 2 money. Player token is then returned to your supply. (Same as ability Mark.)
- If upgraded:
- You may pay 2 for each animal (once per animal) to gain 1 additional appeal.
- When the turn is complete, if you have no animal cards in your hand, you may take 6 cards from the deck, choose 1 animal card from them, and discard the others. (Same as ability Hunter 6.)
- When any player plays an Animal card from the display with your player token on it, gain 1 reputation and 2 money. Then mark another Animal card.
Association
- Partner zoos are taken from the supply, not the Association board. Partner zoos may not be taken from the Association board, even if there are no more in the supply. You can have more than 1 of the same partner zoo. Each reduces the cost of an Animal from that continent.
- If not upgraded:
- When using the "Support a Conservation Project" task, you may instead hire an additional worker. The worker is placed next to the existing worker (so you can't use it until a break).
- If you choose a task with less strength than the action's strength, gain 1 X-token
- If you use this action at strength 5, instead of doing an association board task, you may move the Association card to slot 1, then do a different action (same as ability Determination). You do not need to have an available association worker.
- If upgraded:
- Universities are taken from the supply, not the Association board. Universities may not be taken from the Association board, even if there are no more in the supply. You can have more than 1 of the same university, but universities that increase your hand limit do not stack.
- Each additional worker used reduces the strength cost of a task by 2. (For example, the two tasks "Support a Conservation Project" and "Gain a Partner Zoo" would normally cost 9 strength. But if you use four workers, the strength value is reduced to 5).
- Each time you make a donation, the cost is reduced by the number of X-tokens you have (minimum: 0). The X-tokens are not discarded.
- Instead of making a donation, you may draw 1 card from the deck or within reputation range. You must have performed at least 1 association task to do this.
Build
- If not upgraded:
- You may build an additional pavilion or kiosk for 3 money, no matter what the strength of the build action is.
- Your build strength is X+1.
- You may pay 2 money to cover one (and only one) rock/water space like a building space. This does not apply to building in any other way or when placing a unique building.
- If upgraded:
- The cost to build an additional pavilion or kiosk is now 2 money
- You may build as many buildings as you wish. So if your build strength is 5, you can build 5 size-1 enclosures. You may still not place more than 1 pavilion or kiosk.
- You may cover one (and only one) rock/water space with this action. If you do, gain 2 money.
Cards
- You no longer have to discard any cards.
- You may pay 2 money to move an Action card to slot 1 (same as ability Clever)
- If not upgraded:
- Discard 1 card from the display and replenish or discard 1 card from your hand to draw 1 from the deck (same as ability Digging 1)
- If your action strength is 3 or greater, you may snap a card instead of drawing
- If upgraded:
- Discard 2 cards from the display and replenish or discard 2 cards from your hand to draw 2 from the deck (same as ability Digging 2)
- If your action strength is 2-4, you may snap a card instead of drawing. If it is 5 or greater, you may snap 2 cards.
- You move an Action card to slot 1 for free (same as ability Clever)
Sponsors
- Before or after taking the action (whether adding to Break or playing a card), you may pay 1 X-token to gain 5 money or pay 5 money to gain 1 X-token.
- If not upgraded:
- If you gain money from this action (including effects from other cards), gain 3 extra money
- Before or after taking the action (whether adding to Break or playing a card), you may discard 1 Sponsors card to gain 4 money
- Before or after taking the action (whether adding to Break or playing a card), you may discard a Sponsor card to snap one from the display.
- If upgraded:
- In addition to exchanging money for X-tokens or vice versa, you may pay 5 money or 1 X-token to gain 1 reputation
- If you gain money from this action (including effects from other cards), gain 5 extra money
- Before or after taking the action (whether adding to Break or playing a card), you may discard one card to gain 4 money or reduce the Sponsor card level by 2.
- When choosing the Break option, you may discard a card from your hand and pay X money to play a Sponsor card from your hand (where X is the card's level).
Варыянты
Марскі сьвет
Marine Worlds is a large expansion that includes a new kind of animal, new abilities, new bonuses, new sponsor cards with additional bonuses, and tweaks to rules.
Sea Animals
Sea animals are a new animal type, represented by this icon: Файл:ArkNova seaAnimal.png. Some animals are both a sea animal and another type (like "predator").

Sea animals must be kept in aquariums, which is a new kind of enclosure. Aquariums are special enclosures, like the reptile house or petting zoo, but there are two types--large (five hexes) and small (two hexes). But you can only build one of each in your zoo. They must be built next to a water space, and each adds a water icon Файл:ArkNova Water.png to your zoo. They are available from the start (you do not need to upgrade your Build card).

Some animals can live in either the reptile house or an aquarium. When you build an aquarium, you can move an animal from the reptile house into the aquarium or vice versa. Like the reptile house and aviary, player tokens indicate the number of animals within. But for aquariums, you can split player tokens between them (e.g., you can play a size-3 animal in an aquarium by placing 2 tokens in a small aquarium and 1 in a large aquarium).
| Файл:ArkNova aquariumRequired.png | The red number and aquarium symbol indicate this animal can only be contained in an aquarium. The red number indicates the animal's size. The aquarium number indicates how many player tokens you must place. (Note: although the icon depicts a large aquarium, the animal can go in any aquarium.) |
| Файл:ArkNova aquariumRockRequired.png | The rock icon indicates this animal must be placed in an aquarium adjacent to a rock space. It is size-3, but only needs two player tokens placed. If you split the tokens, both aquariums must be next to a rock space. |
| Файл:ArkNova aquariumOrReptileRequired.png | An aquarium symbol and a reptile house symbol indicate the animal can be housed in either enclosure. You cannot split player tokens between the reptile house and an aquarium. |
| Файл:ArkNova aquariumOrStandard.png | This animal can be kept in a standard enclosure space of size-3 or an aquarium, using 2 player tokens. But the enclosure must be adjacent to a rock hex and a water hex. |


Reef Dwellers
Some animals are Reef Dwellers, indicated by this icon Файл:ArkNovaMW reefDwellerEffects.png in the upper right (below their animal icons). When you play an animal with Reef Dweller (in the upper right below their animal icons), the Reef Dweller effects of all animals in your zoo activate and confer their benefits. This means you may get an animal's benefit more than once.

If the card's description contains a coral icon Файл:ArkNovaMW reefDweller.png, it is describing its Reef Dweller effect. If not, then it is a normal one-time effect (e.g., Venom, Clever, etc.)

Wave Файл:ArkNovaMW replenishWave.png

All sea animal cards and some sponsor cards have this symbol. It has no effect when the card is played. Instead, it has an effect when the card is placed in the display. When a card with a wave icon is added to the display, an additional card is discarded and replaced.
New Universities
There are new universities to take using the Association action, but there are rules around them. Each player can have a maximum of 1 new university. Only one player can gain a new university per break. The later you take a new university, the smaller your choices get.